
Exploring the Meshtastic Solar Node: A DIY Solar-Powered Communication Solution
Published by Vivian van Zyl in Meshtastic the 11/22/2024 at 07:11 pm

Welcome to an exciting journey into the world of DIY solar technology! In this blog post, we’ll delve into the creation of a remarkable device known as the Meshtastic Solar Node. This innovative project combines 3D printing, solar power, and advanced electronic components to create a fully standalone communication unit. Let's explore how this project came together and the various components that make it work.
Table of Contents
- Introduction to the Meshtastic Solar Node
- Design and Components
- Airflow System
- Waterproofing and Durability
- Installation and Setup
- Testing and Performance
- Conclusion
- FAQs
Introduction to the Meshtastic Solar Node
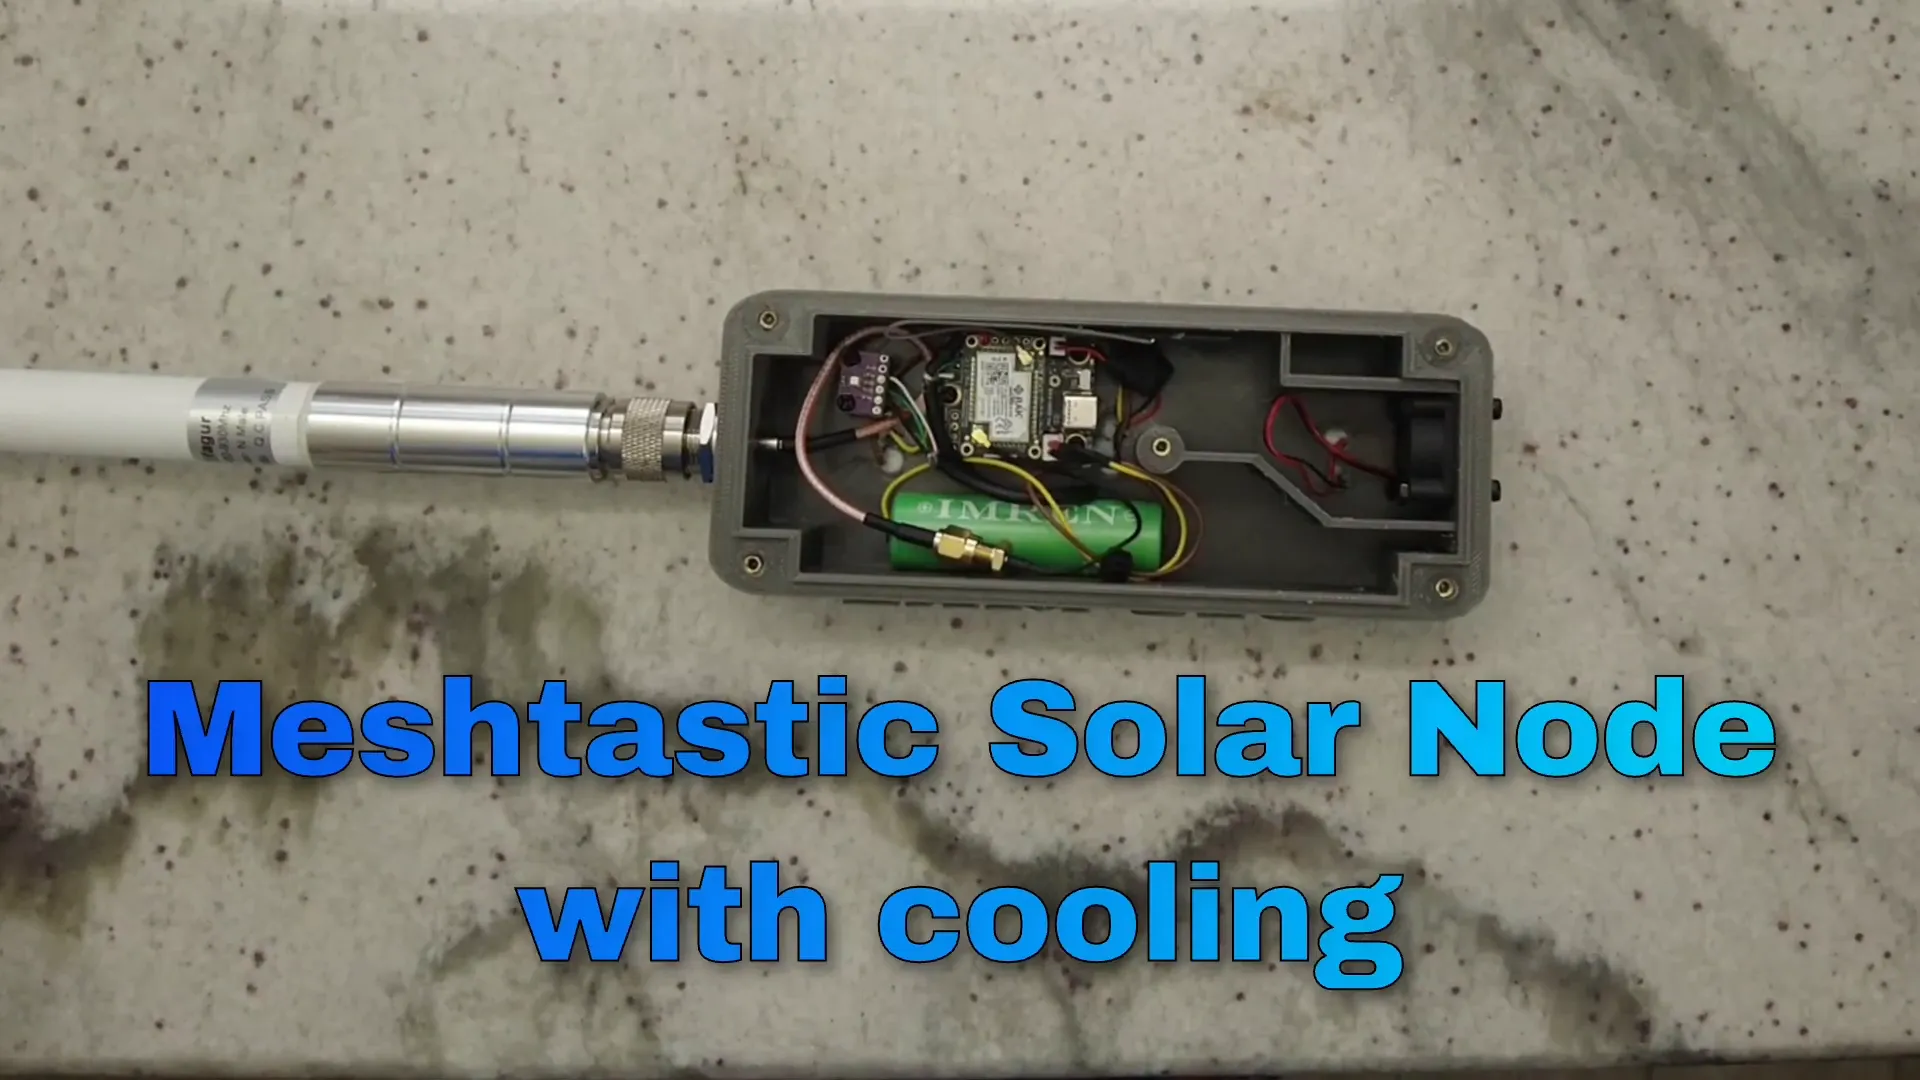
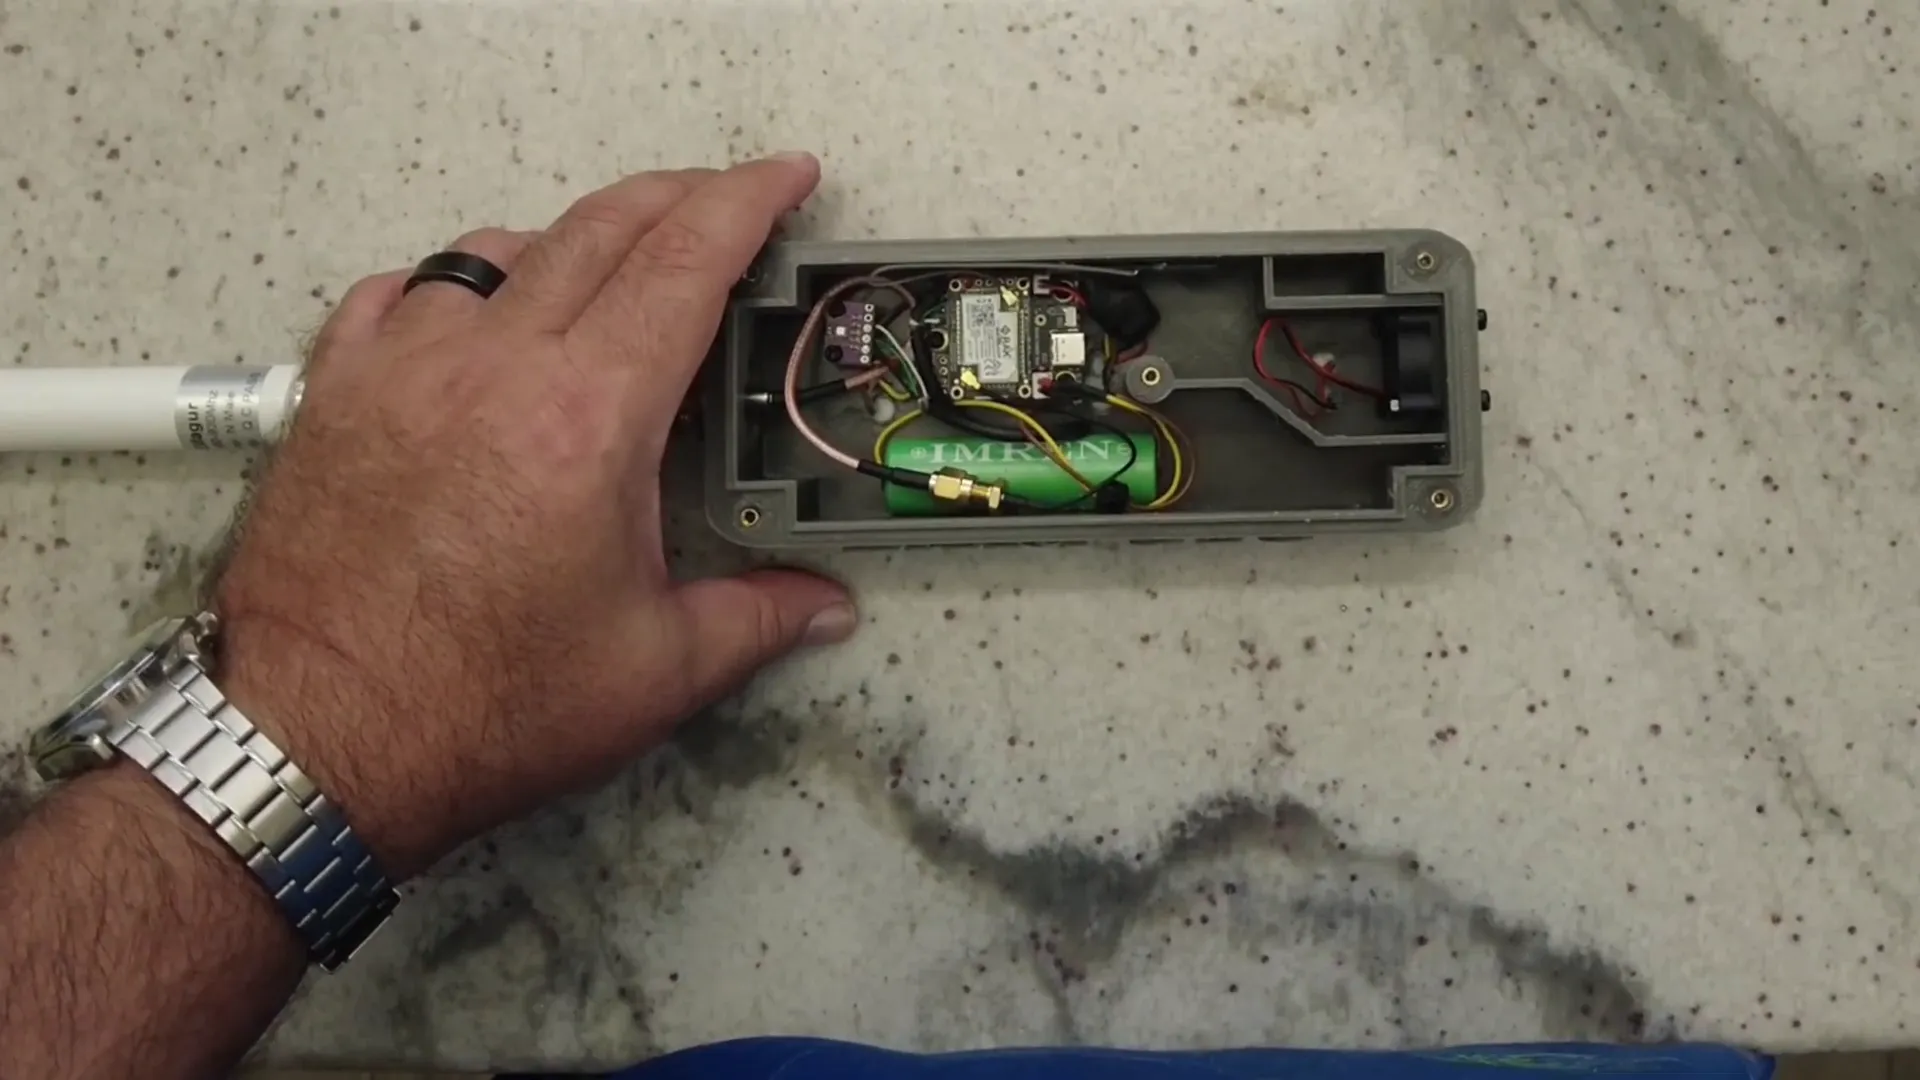
The Meshtastic Solar Node is a unique project that utilizes a 3D printed case made from PETG material. It's designed to house various components that work together to create a self-sustaining communication device. This device features three solar panels on the front, a prominent 9915 MHz antenna, and an array of internal components that ensure its functionality.
Design and Components
The design of the solar node is not only functional but also aesthetically pleasing. The case is crafted to accommodate several important components, each with a specific role in the operation of the node.
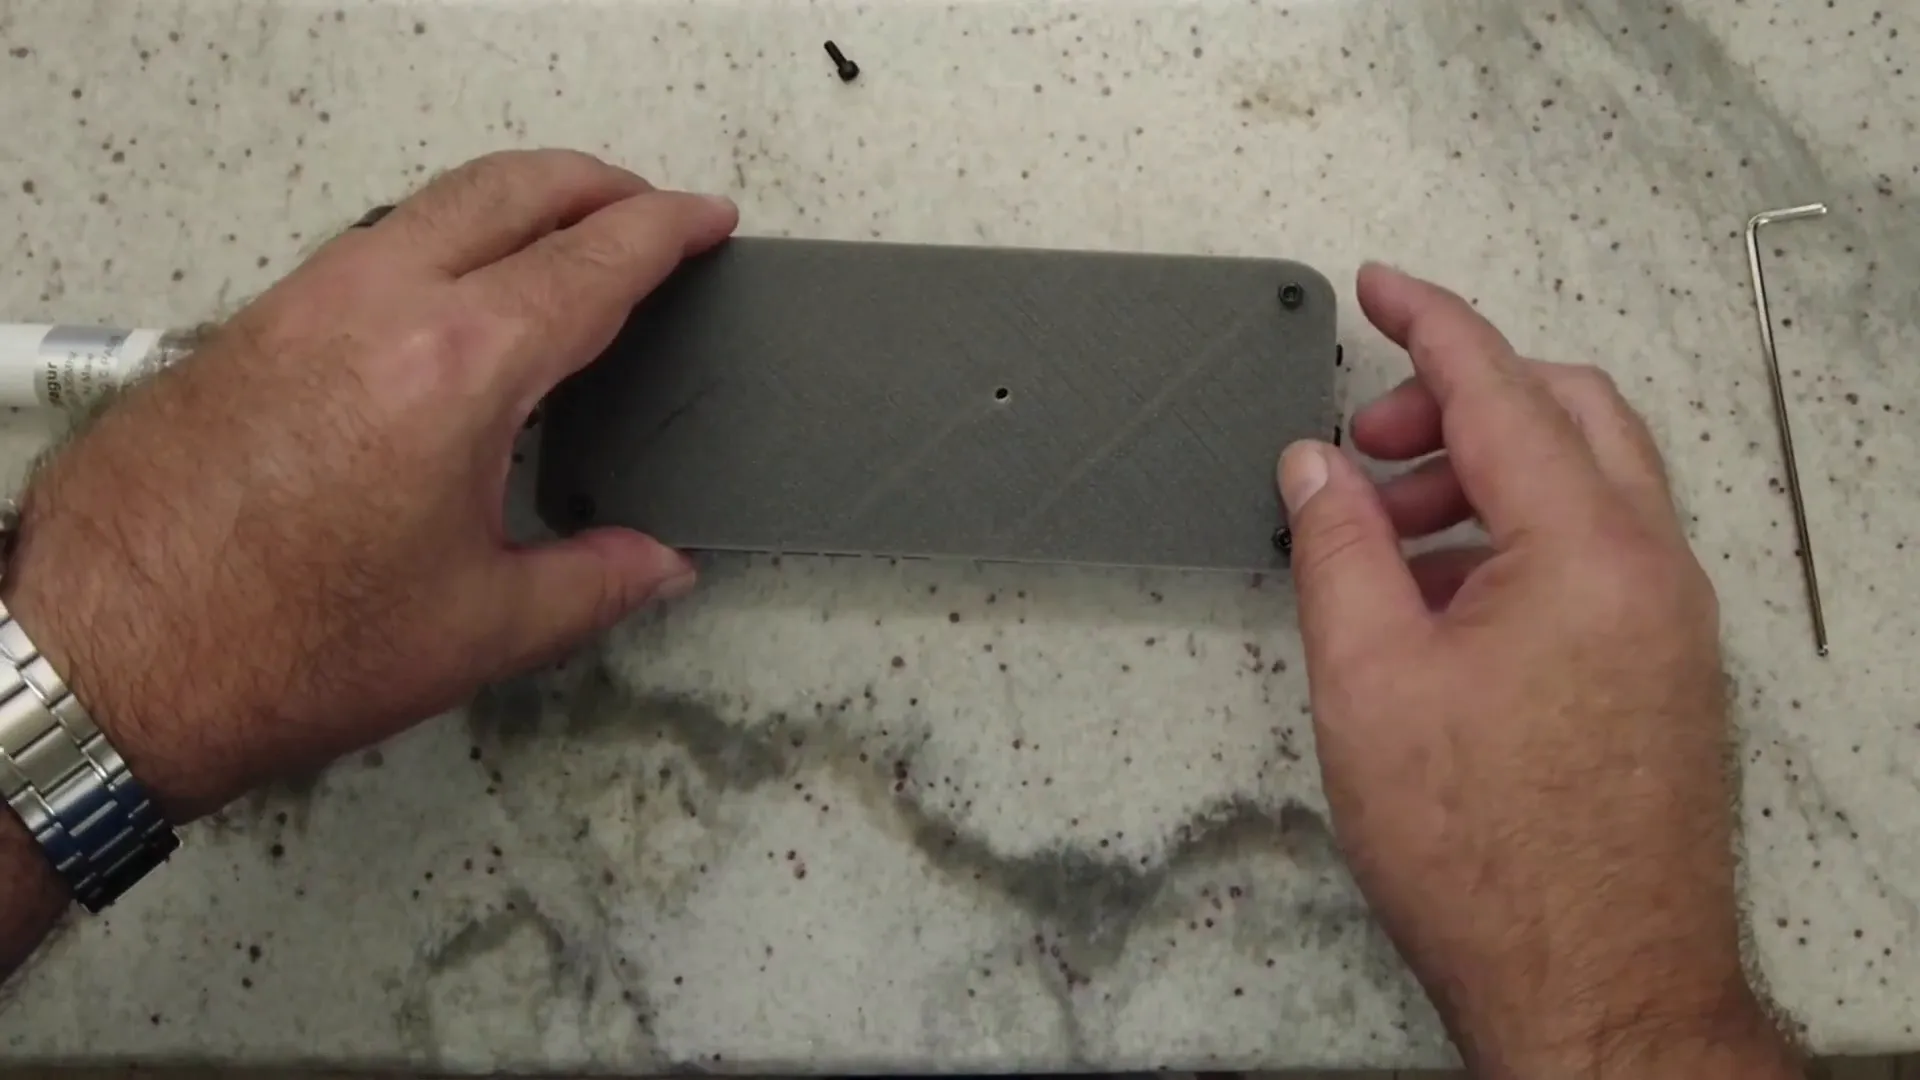
3D Printed Case
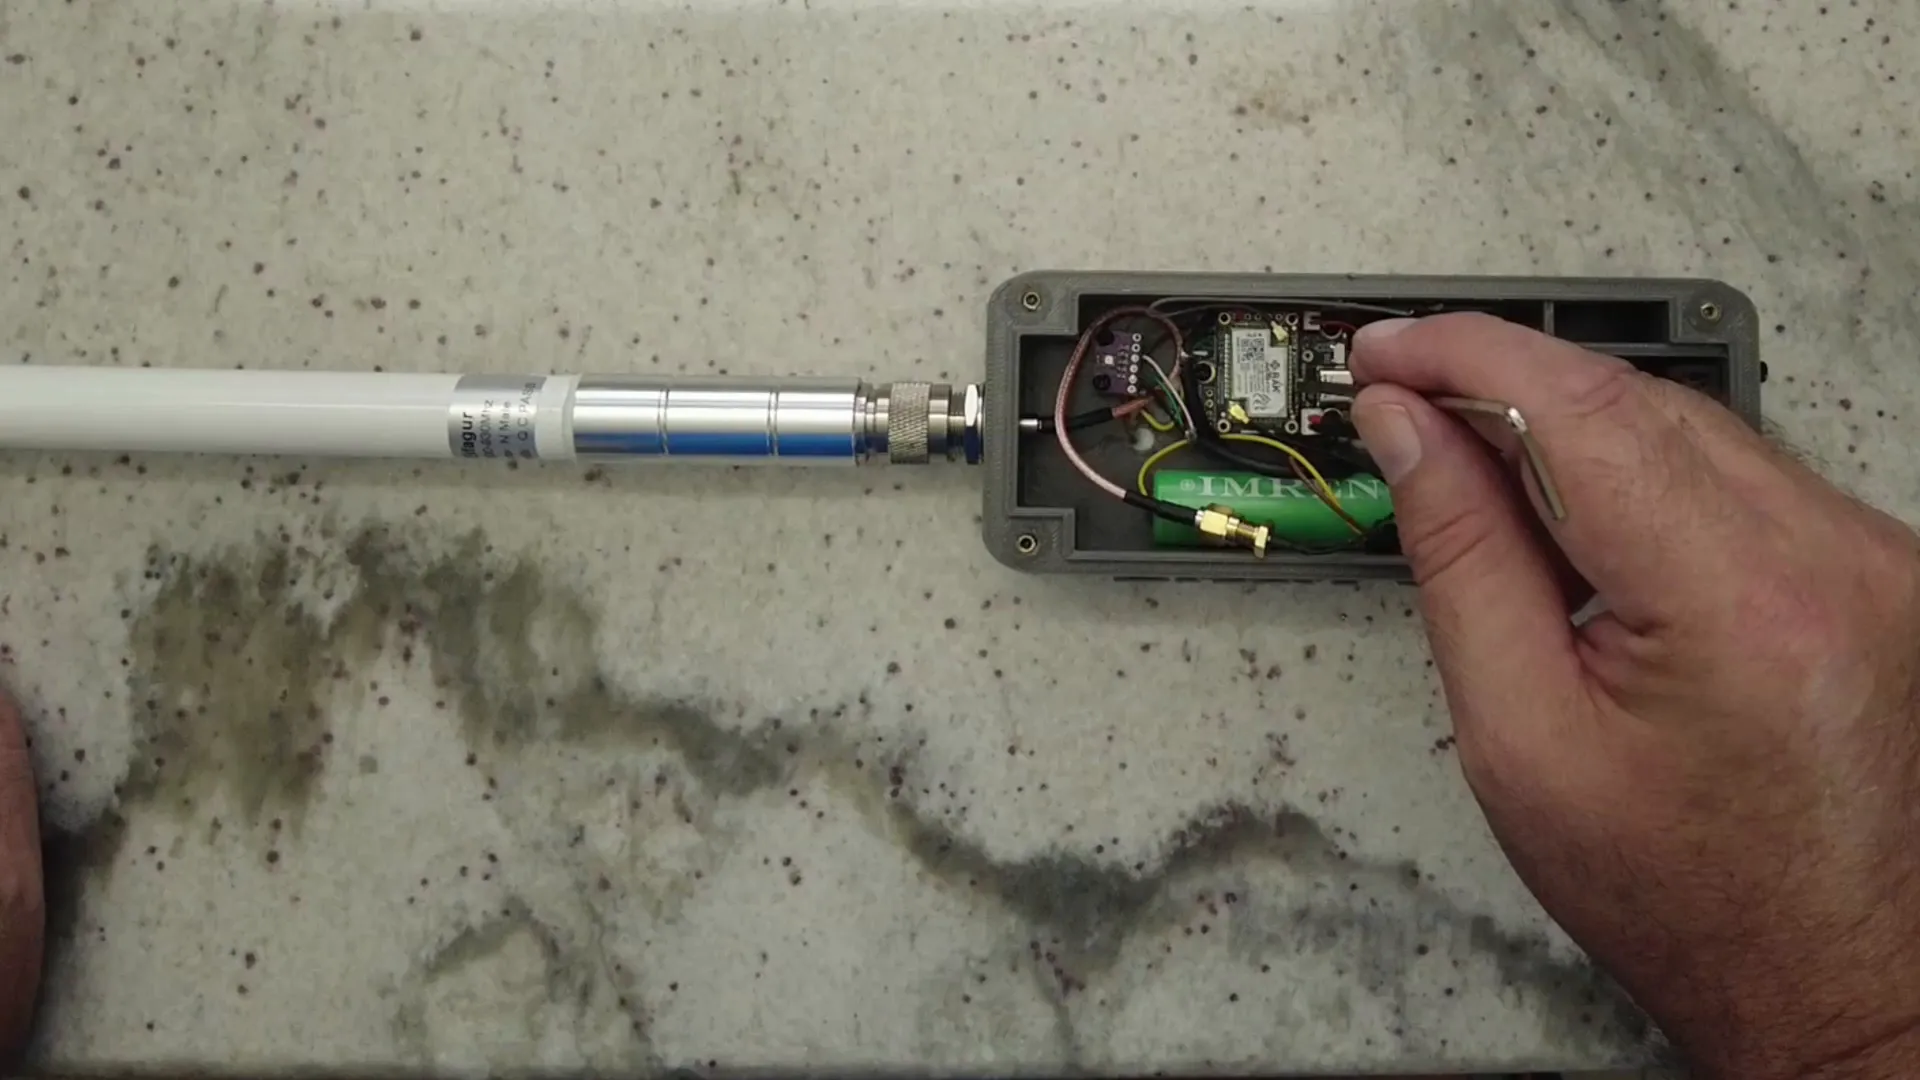
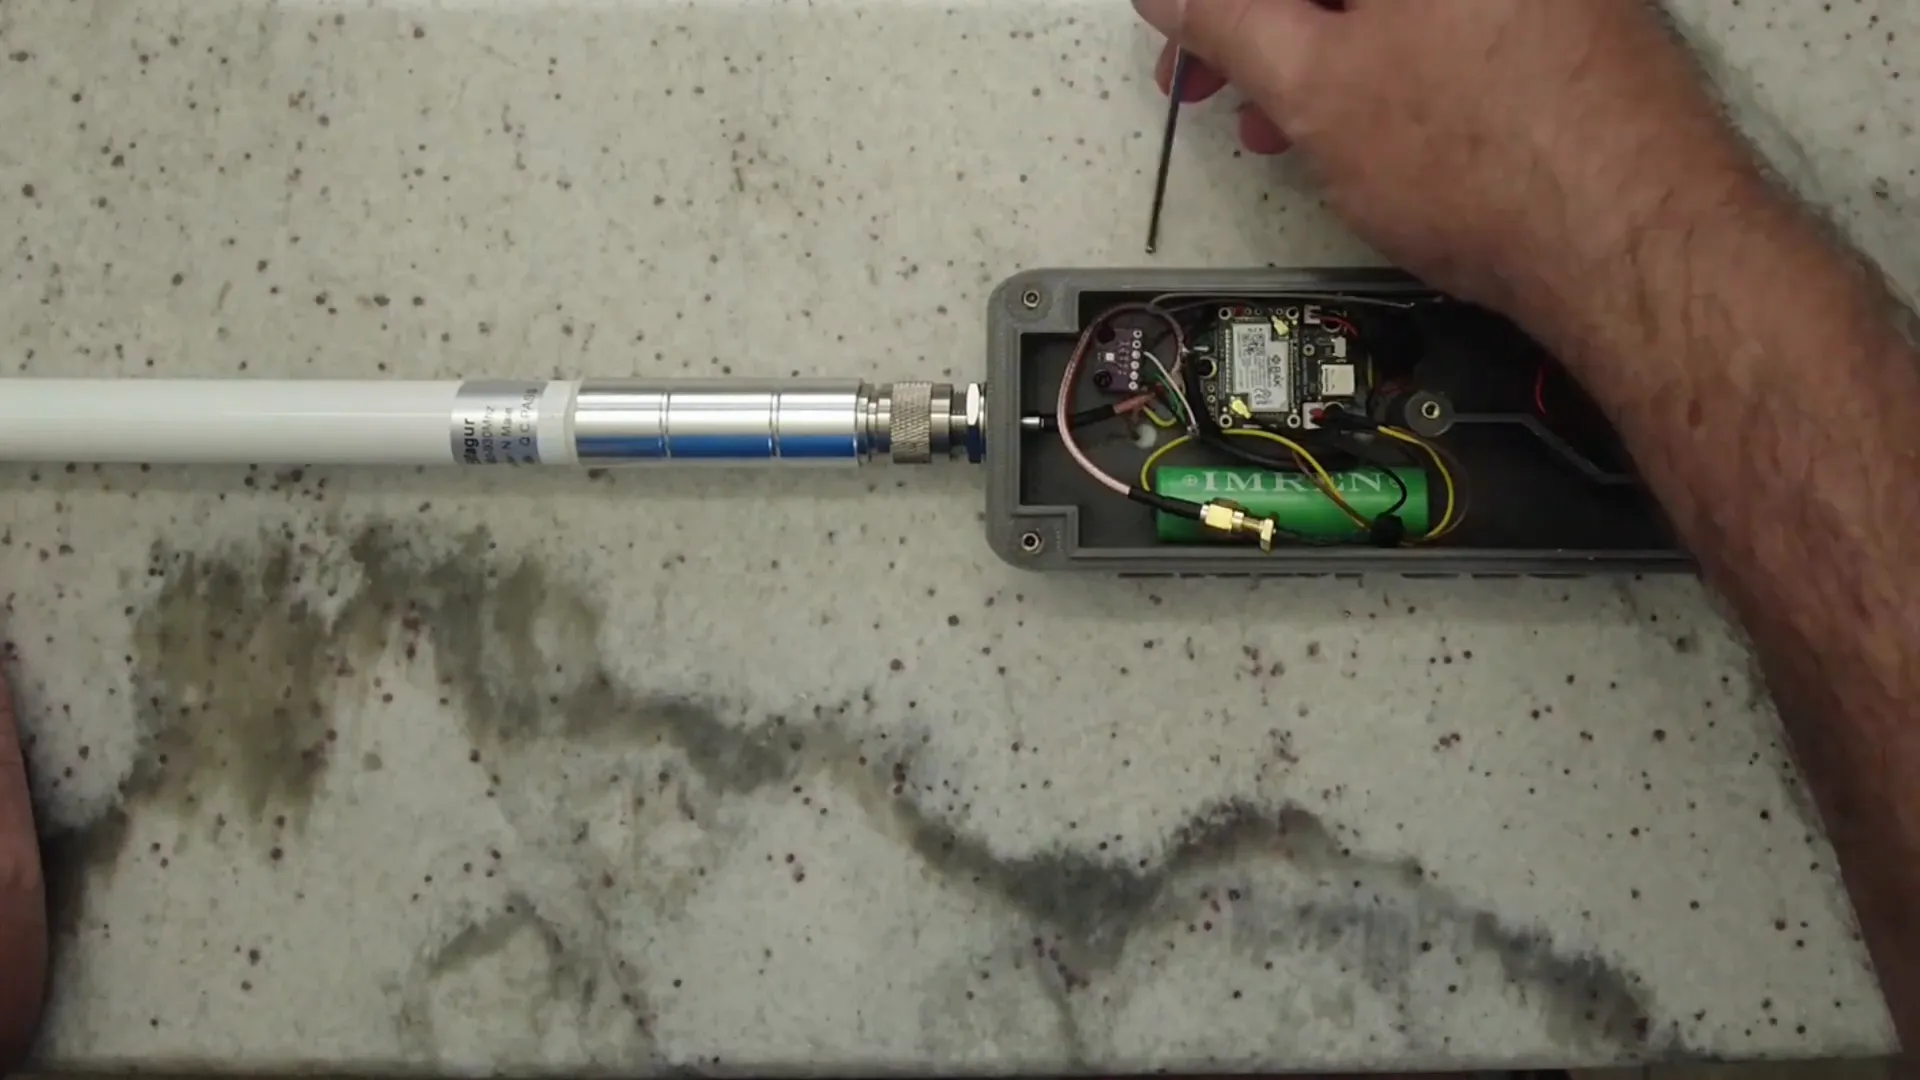
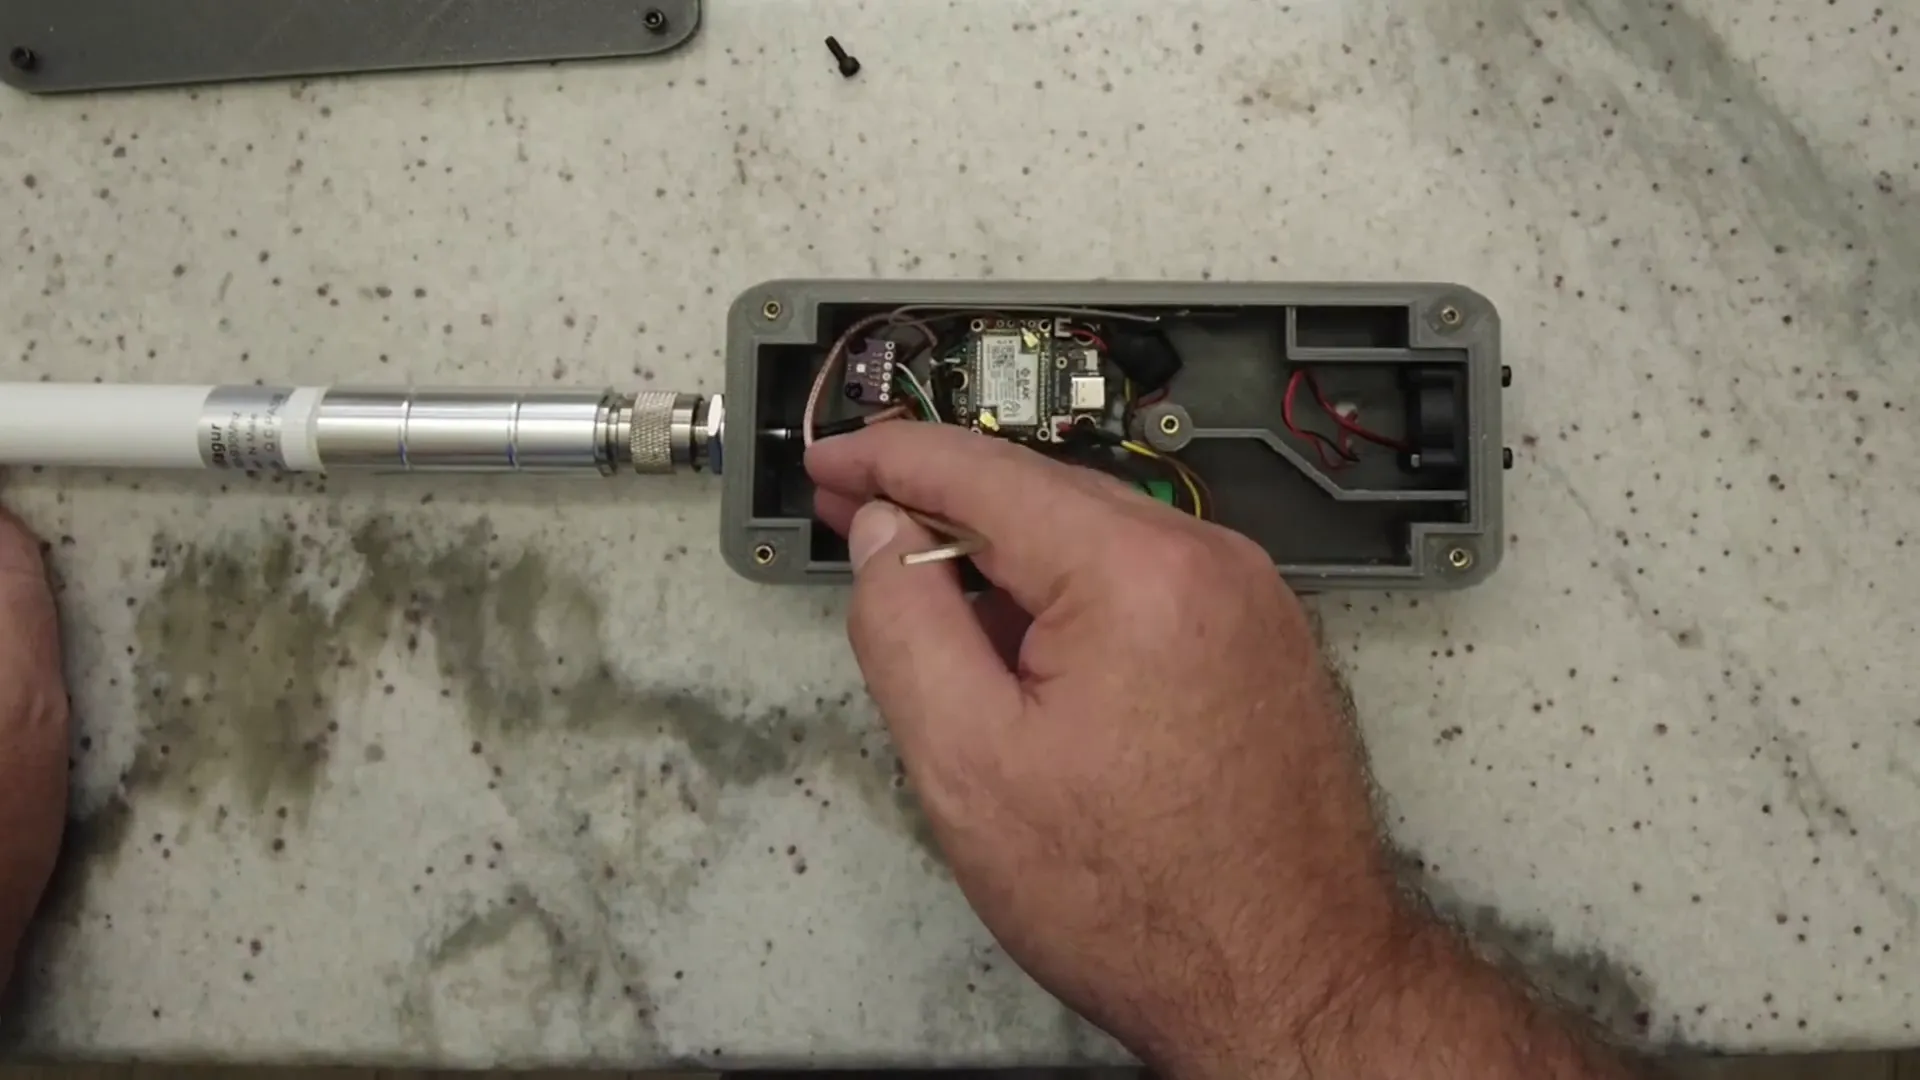
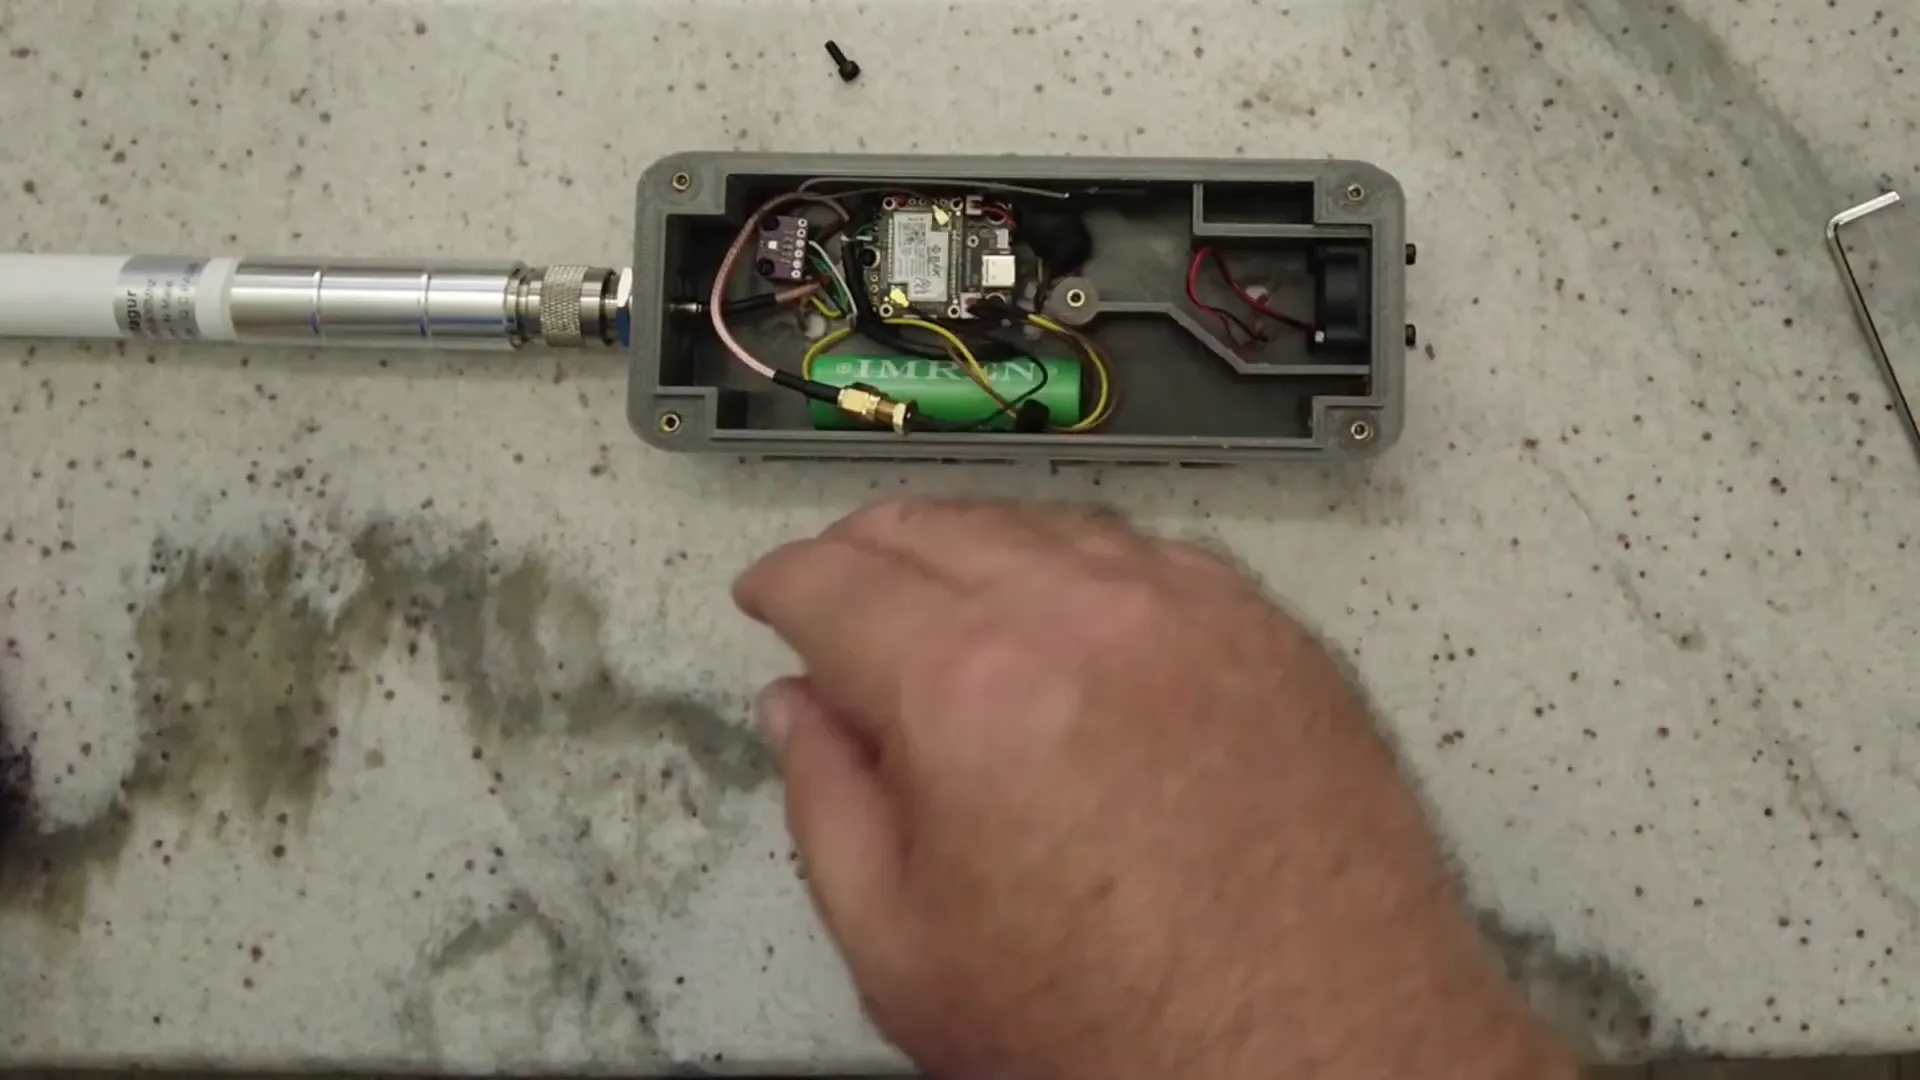
The case itself is a significant part of the project. It’s printed using PETG, which is known for its durability and weather resistance. Inside this case, several key components are installed:
- Cooling Fan: Located at the bottom, this fan is connected to the bottom solar panel and is crucial for airflow.
- RAK Mini: This small computer serves as the brain of the node.
- Battery: A rechargeable battery stores energy harnessed from the solar panels.
- BME 280 Sensor: This environmental sensor monitors conditions inside the case.
- Step-Up Voltage Converter: This component increases the voltage from the solar panels to the necessary 5 volts.
Solar Panels and Power Management
The solar node incorporates three solar panels that generate power for the unit. The bottom panel is specifically connected to the fan, allowing it to operate based on the energy collected. The two upper panels feed into a step-up voltage converter, which boosts the output from 3.3 volts to 5 volts. This is essential for charging the battery and powering the RAK mini.
When sunlight hits the panels, they generate electricity, which is then used to charge the battery. This ensures that the node remains operational even during cloudy days or at night, thanks to the stored energy.
Airflow System
Airflow is a critical aspect of the design, as it helps maintain optimal temperatures for the internal components. The airflow system is designed with efficiency in mind:
- Air is drawn in from the bottom through three holes.
- This airflow passes over the battery and the RAK mini, helping to cool these components.
- The fan then expels the warm air, creating a continuous cycle of fresh air.
Waterproofing and Durability
Given that the solar node is intended for outdoor use, waterproofing is an essential feature. The design includes several protective measures:
- Sealed Solar Panels: The solar panels are sealed to prevent water ingress.
- Rubber Gaskets: These are used around connectors to ensure a watertight seal.
- TPU Gasket: A printed TPU gasket is inserted into the case to provide additional protection.
These features ensure that the node can withstand rain and harsh weather conditions. The design is such that water would have to travel a considerable distance to reach the electronics, making it highly resilient.
Installation and Setup
The installation process for the Meshtastic Solar Node is straightforward. The node can be easily mounted on a pole, such as the one on a roof. Here’s how it works:
- The case is secured using cable tie mounts located at the bottom.
- The solar panels must be oriented towards the sun to maximize energy collection.
- Once installed, the node becomes a completely standalone unit, capable of functioning independently.
Testing and Performance
After building the solar node, extensive testing was conducted to ensure that all systems functioned as intended. The results were promising:
- The battery charges effectively from the solar panels, even on partially cloudy days.
- The fan operates as designed, providing necessary airflow to cool the internal components.
- The node functions as a standalone communication unit, capable of sending and receiving data.
This successful testing phase confirms that the Meshtastic Solar Node is a viable solution for outdoor communication needs.
Conclusion
The Meshtastic Solar Node project showcases the power of combining solar energy with modern technology. This DIY project not only demonstrates creativity and engineering skills but also emphasizes sustainability. With its robust design, effective cooling system, and reliable power management, this solar node is an excellent example of how we can harness renewable energy for practical applications.
Whether you're interested in building your own solar node or simply looking for inspiration, this project highlights the possibilities within the realm of DIY solar technology.
FAQs
What materials are needed to build a Meshtastic Solar Node?
To build a Meshtastic Solar Node, you will need PETG filament for 3D printing, solar panels, a battery, a RAK mini, a BME 280 sensor, a cooling fan, and a step-up voltage converter.
How do you ensure the solar node is waterproof?
Waterproofing is achieved through sealed solar panels, rubber gaskets around connectors, and a printed TPU gasket inserted into the case to prevent water ingress.
Can the solar node operate at night?
Yes, the solar node can operate at night as it stores energy in the battery during the day, allowing it to function even without direct sunlight.
How is the airflow managed within the node?
The node features an airflow system with intake holes at the bottom, allowing air to be drawn over the battery and electronics, which is then expelled by the fan.